ChillControl
Github link: https://github.com/Jmov9/ChillControl
Github link contains more information on how the device works.
Introduction
Tapio
My programming background comes from the courses included in my curriculum. Since I’m studying ICT infrastructure, there aren’t that many programming courses. 😀
I can code a basic website and a simple snake clone.
For 3D, I’ve taken the Blender course and the 3D printing course, so I’m pretty much a novice there as well. But I’m capable of making something like a box in Blender and preparing it for 3D printing. I completed those courses within the last few months, so I can still remember most of it.
I have no prior experience in robotics.
Janne Varis
I wouldn’t call myself a top-tier coder, as my studies have mostly focused on service design. I can read code well enough to understand roughly what’s going on, and I can definitely pull off some simple tasks myself.
As for IoT devices, I took a course called ‘IoT Business Perspective’ about two years ago. It gave me a good foundation on what they are and how they’re built. I don’t have any hands-on experience with robotics or 3D printing yet, but I find both topics really interesting.
Olli
I did not have any prior programming experience before starting school, and at school I have only completed the mandatory coding-related courses so far. In my own projects, I have used AI tools to help me write the code I needed.
My background in 3D is quite similar. Before school, I had very little practical experience in 3D modelling, but I have since completed a Blender course and a 3D printing course as part of my studies.
As for robotics, I do not yet have much hands-on experience, but I am interested in learning more.
Ideas

The Lotus Blossom started with “IoT-device”. Very broad and open by design. Around that for expansions were motor, camera, sound sensor, temperature sensor, magnet sensor, a screen and distance sensor.
The ideas blossomed in different directions. Some notable ones were an IoT-device that informs if a parking spot is open, a device that starts nagging if a door to a sauna is open for too long, and in the vein of that a smart device to monitor a fridge. Counting how many times the door has been opened, what’s the temperature and how to visualize that data.
Another idea that was a bit more out there, was a game with motion control. A sort of version of Pong but the bat is controlled by the players’ hand. Nintendo beat us to it with the Wii in 2006 unfortunately.
We took a democratic approach and voted on the ideas on the Lotus Blossom and the smart device to monitor a fridge came out on top. So, we began with the initial prototyping with the device. In its infancy, the device had a screen, magnet sensor and a temperature sensor. We added features with each session. More about that in the building phase section.
What did you need to learn
Describe the initial scope of the project and list the learning objectives
We learned how to show the data of all the sensors and how to manipulate them for our needs. Our mainstay secretary Gemini was really working overtime. Taking care of most of the code. We had learned about the basic libraries in the first two lectures. So we utilized those for the LCD screen and for Wi-Fi. We also had to learn how to get an IoT device to send data to the internet and how to enable the device to receive data back from the web.
In addition to software-related learning, it was also important to learn how to route the wires in a clear and organized way. This made the setup easier to assemble, easier to understand, and simpler to modify when changes were needed.
The building phase
Ultimately, we chose to develop a smart tracking system for fridges. The choice was based on the practicality and scalability of the idea: monitoring energy consumption and ensuring the cold chain are real-world challenges. We wanted to create a solution that wouldn’t just collect data, but would provide actual value to the user through features like electricity consumption calculations.
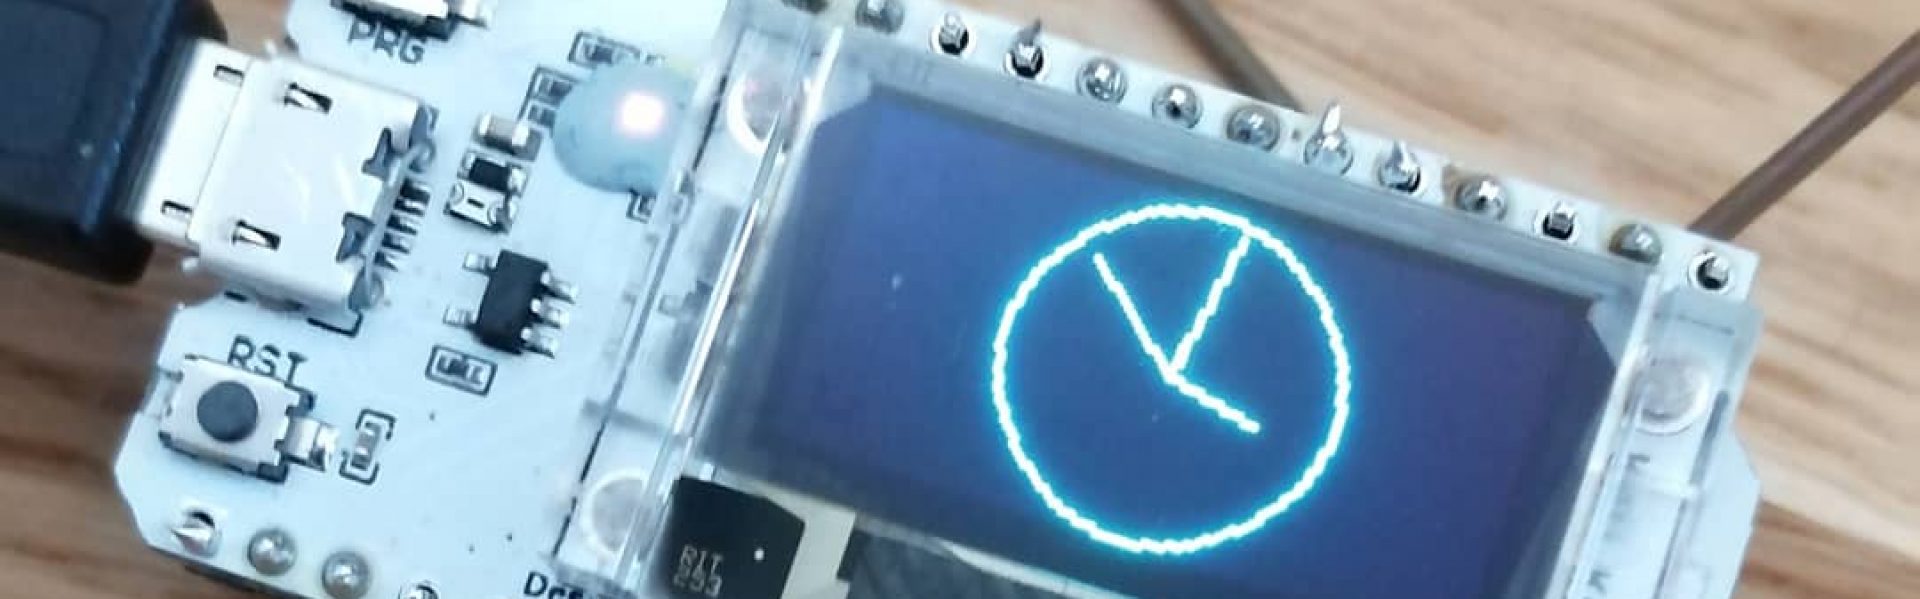
We started with a barebones iteration of the project. First it was basically an LCD screen that showed the temperature and a magnet sensor that measured how many times an imaginary door was opened. First hurdle was to get the data with a sensible refresh rate. We wanted to know if the door was open in real time.
Hardware Integration and Technical Hurdles
Once the concept was clear, we moved on to hardware testing. We used an ESP32 microcontroller, connecting it to a Hall effect sensor (magnet sensor), an OLED display, and a DHT11 temperature and humidity sensor.
Our learning was driven by doing. Initially, we faced challenges with wiring and selecting the correct pins. We quickly realized that while code might be correct in theory, the physical execution—such as wire management and the tightness of connections—is what determines if the device actually works. We utilized Gemini AI to help plan the code structure and for troubleshooting, which significantly sped up the ESP32 programming. A particularly educational moment was resolving an issue where the temperature sensor displayed a default value due to a faulty unit; this taught us how to distinguish hardware failures from software bugs.
Shifting to the Cloud: MQTT and Modular Development
The most significant technical leap in the project was moving local data to the cloud. While we initially tested data visualization with standard dashboards, we wanted more control. We decided to use Adafruit.io and the MQTT communication protocol. At first we used Thing speak, but that was not as versitile as Adafruit.io.
MQTT allowed for bi-directional communication: we weren’t just sending temperature and door-opening data to the cloud; we could also control the device through the dashboard. This was the turning point that allowed the device to become modular. What started as a simple fridge monitor evolved into a versatile system with two distinct modes: Fridge Mode and Cooler Mode.
Cooler Mode: We added the ability to adjust the temperature alarm threshold remotely. If the cooler gets too warm, the device’s buzzer starts beeping. This is perfect for road trips or outdoor events where maintaining a specific temperature is critical.
Fridge Mode: We integrated a consumption meter that calculates the cost of “wasted energy” in euros. It uses average fridge consumption data and average electricity prices to show how much leaving the door open costs the user over time.
The Physical Prototype and Finishing Touches
In the final stage, we assembled everything into a physical product. We used a styrofoam cooler as the frame and housed the electronics in an iPad cardboard box attached to the lid.
During this phase, we prioritized maintainability and documentation. We tore down our original “messy” test wirings and replaced them with a fully color-coded system.
This makes future troubleshooting easy: if a wire comes loose, anyone can check the color-coded comments in the code to see where it belongs. While the look is “industrial,” the device is technically reliable and performs exactly as intended.
Learning by Doing – Key Takeaways
This project taught us that building an IoT solution requires a balance between hardware, code, and usability. Simply collecting data isn’t enough; the data must be accessible and actionable. We learned to master the basics of MQTT, understood the importance of power management (such as offline memory settings), and discovered that in the world of IoT, even a small idea can grow into a smart, functional system with just a bit of ‘learning by doing’. From a barebones idea to a fully functional, modular prototype, this journey proved that the best tech solutions are a balance of functional logic, creative prototyping, and a user-centric approach.


The outcome
What did you learn?
We learned how to build an ESP32-based IoT device by integrating various physical sensors and using MQTT with Adafruit.io for cloud connectivity and remote control. The project taught us the power of modular design, allowing us to adapt a single device for different real-world uses. Above all, we gained a solid foundation in IoT, which has sparked a genuine interest in continuing to build our own independent projects in the future.
Did this course make you more interested in tinkering, or was this a one-off thing for you?
I’m confident that the course has increased our interest in IoT, and we will definitely be doing some small independent projects moving forward.
What further ideas did you get for making in the future?
The refrigerator’s electricity consumption could be calculated in real time based on the current market price of electricity instead of using a fixed average price. Other potential areas for future development include a more polished enclosure, such as a 3D-printed case, a fully custom-built dashboard website, and some energy saving methods like ECO mode.
More experimental ideas could be smart surveillance camera that could detect fridge users and take a picture of the things that user took. Camera could also save who opened the fridge and when. Buzzer data could also be shown in the dashboard.